
It's the holidays, and that means parties and good food. Let's face it, we all want to impress our friends and family with our amazing skills in the kitchen and on the grill. Nothing is more impressive than Prime Rib. Relatives you haven't seen in years will arrive promptly for Christmas dinner if word gets out that Prime Rib is on the menu!
Well, this year we did something we always dreamed of doing at the ThermoWorks demo kitchen—we smoked our Prime Rib. Was it good? Let's just put it this way, properly prepared Prime Rib alone is spectacular; but smoked Prime Rib is something you have to taste to believe.
Characteristics of good Prime Rib
Prime Rib is not a cheap cut of beef to play around with. You'll have to invest a little in this cut of meat, but it will more than pay you back. And with the right tools (like RFX MEAT™ Wireless Probe Thermometer or Smoke X4®) and a few key temperatures firmly in mind, you can feel confident smoking your holiday meal this year.
J. Kenji López-Alt of SeriousEats.com has put together the three commandments of Prime Rib Perfection. We agree completely and thought we would pass on these words of wisdom.
Commandment I:
The Perfect Prime Rib must have a deep brown, crisp, crackly, salty exterior crust.
Commandment II:
The gradient at the interface between the brown crust and the perfectly medium-rare interior must be absolutely minimized (as in, I don't want a layer of overcooked meat around the edges).
Commandment III:
The Perfect Prime Rib must retain as many juices as possible.
J. Kenji López-Alt, The Food Lab, pg. 630
Let us teach you how to keep these commandments while preparing your Prime Rib.

How to Smoke Prime Rib: 8 Simple Steps
What You Will Need:
- 1 Prime Rib Roast 7–15lbs, depending on the size of your party (ours came from E3 Meat Co.)
- Kosher salt
- Black pepper
- Montreal steak seasoning or your favorite BBQ rub (optional)
- Cotton kitchen twine
Step 1: Tie Your Prime Rib
First, you will want to tie your rib roast. This will pull everything together into a uniform shape and density for a nice even cook. Tying also helps you keep commandment number three, which is to retain as many juices as possible. When you don't tie your Prime Rib Roast, the meat can separate, allowing for an uneven cook and juices to spill out.
- Cut off the "lip" off the roast so that it more closely resembles a cylinder.
- Wrap the twine around the roast, and loop it through itself every 1 ½ to 2 inches, creating tight wraps down the length of the roast. Finish by wrapping the roast lengthwise and tying another secure knot. Snip off the excess twine.
(If you're going to skip a step, this is the one! The others will have a bigger impact than this will. If you don't tie it up, it's best to have it with the bones still on.)
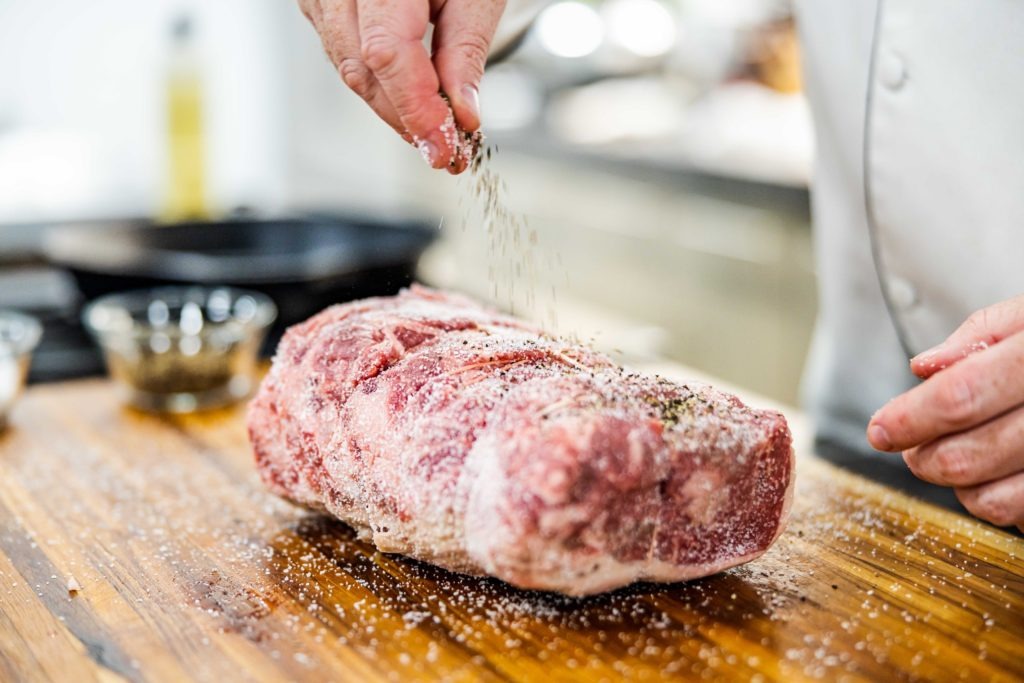
Step 2: Season Your Prime Rib
You will want to season your roast heavily. A prime rib roast is a large piece of beef and therefore needs a great deal of seasoning to penetrate the meat. The seasoning will also help us with commandment number one: it will help you get a crisp, crackly, salty crust. The crust may be the best part of the whole prime rib! Plenty of salt and pepper will do, some Montreal seasoning is great, but you don't want to cover the delicious beefiness of the prime rib.
Step 3: Refrigerate the Prime Rib Overnight
After your meat is seasoned with the rub mixture, we suggest letting it sit in the fridge overnight. The salt in the rub will draw out some moisture and end up dissolving in the meat. During this time the salty liquid will molecularly alter some meat proteins, loosening its structure, allowing your meat to become better seasoned and able to retain juices during the cook.
Step 4: Sear your Roast
Searing a rib roast is essential. Without the sear, there's no deep meatiness, no high-flavor edge to the dish. Not even the addition of smoke can redeem a medium-rare rib roast that has not been seared. Do not skip this step.
That being said, when you sear it is kind of up to you.
In the research we conducted leading up to our article How to Cook Prime Rib: The Science of Perfection, we found that the best results came from an initial sear, followed by a low-temp roasting. This provided a measurably smaller grey ring in the meat.
But … if your smoker doubles as a grill? Well, searing after the smoke and doing it over direct heat on a grill so that you get fire flavor as well as smoke starts to sound very nice. If you opt for this (as we did in the video linked above), let the rib roast rest, or even chill, while you bring the smoker up from smoking temp to searing temp. Letting the surface cool while the temp comes up in the grill will help prevent overcooking and that unsightly grey band.
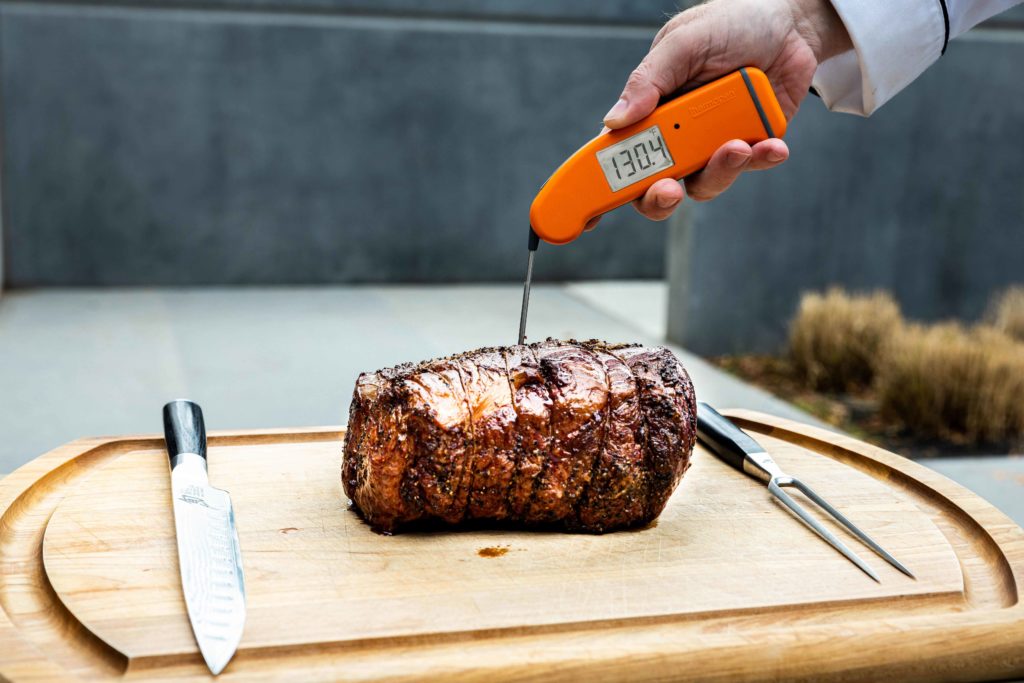
Step 5: Thermometer Probe Placement
An accurate leave-in probe thermometer can help make sure you hit your temperatures and get the results you want! While your smoker is heating up, it's time to place the thermometer probes. Use your RFX MEAT Wireless Probe Thermometer or Smoke X4 multi-channel thermometer to monitor both the temperature of the smoker and the temperature of your roast.
- The penetration probe in the center of the prime rib will let us know when to pull the meat from the heat.
- The air probe, attached with the grate clip, tracks the ambient temperature in the smoker surrounding the meat so we can respond to spikes or drops in temperature.
Place the tip of the probe in the very center of the rib roast, entering from one of the ends of the cylinder, or, if your roast is very long, angling in from the top surface. You want the probe in the thermal center of the meat—the spot furthest from any surfaces.
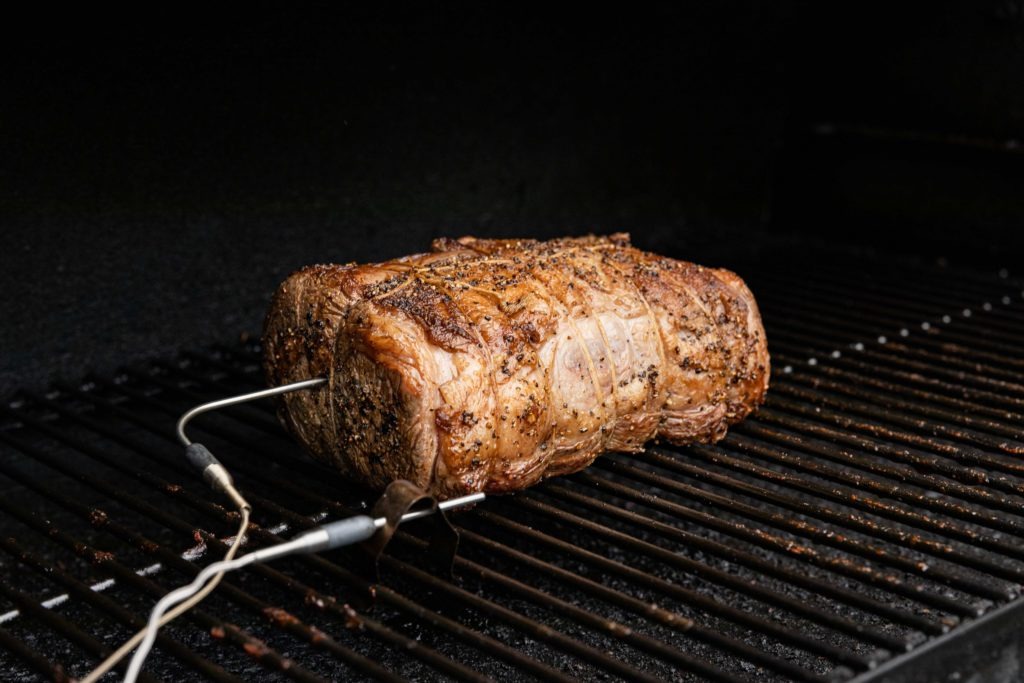
Step 6: Smoke Your Prime Rib Nice and Slow!
To avoid the overdone gray outside of the roast, and to get a nice deep smoke flavor, you will want to smoke your Prime Rib at a low temperature. We suggest your smoking temperature be set between 225 and 250°F (107 and 121°C). This method of cooking it low and slow will help the interior of your roast to look like something out of Bon Appetit magazine and give it a flavor unlike anything you've ever tasted.
- After searing, place your rib roast in the smoker and set the meat probe's high-temp alarm on your Smoke to 125°F (52°C).
- Set the high-temp alarm on your thermometer's air-temp channel to 250°F (121°C) and the low-temp alarm to 200°F (93°C). Adjust your smoker appropriately if your temperatures leave this range. (Or, if you have one, use Billows® BBQ Control Fan to keep the temperatures in range.)
- Now it’s time for the waiting to begin. Our 7-pound Prime Rib took about 3.5 hours to reach 125°F (52°C).
When your meat's high-alarm sounds, verify the temperature with your Thermapen® ONE.
Step 7: Tent and Rest Your Prime Rib
Tent the roast loosely with foil, and let it rest for 5–10 minutes before carving to let the temperature gradients normalize and the juices redistribute within the meat—after all, we're trying to make the juiciest and most flavorful prime rib you’ve ever had. Remember, your roast will continue to rise by roughly 5°F (3°C) as it rests. To see exactly how much carryover there is, leave the probe in while it rests. You can use the carryover info next time you cook a similar roast to gauge your pull temp.
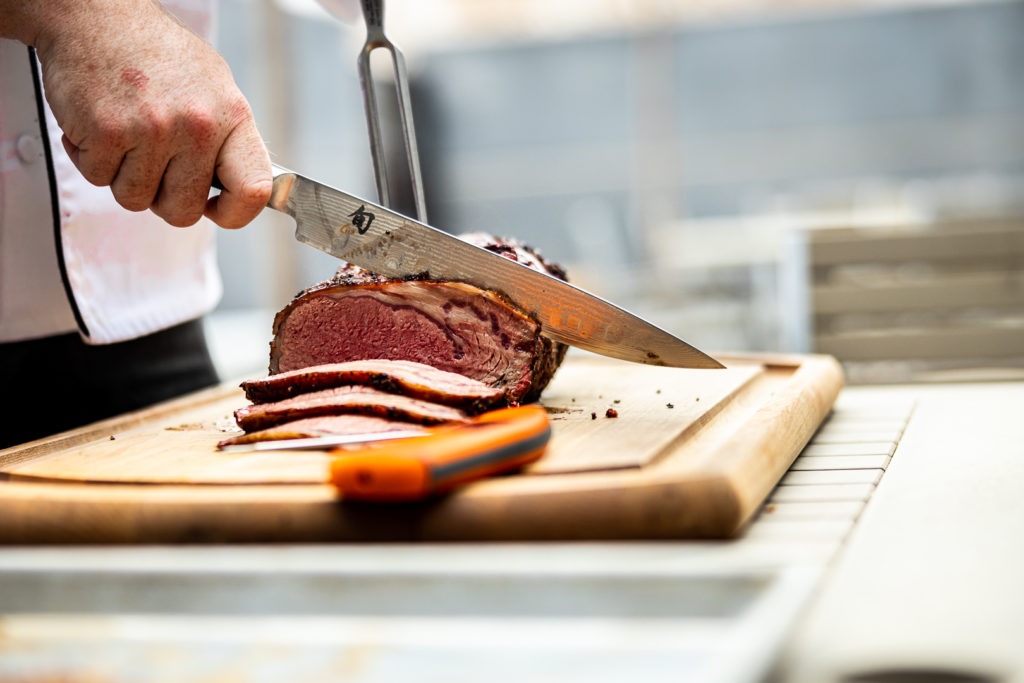
Step 8: Carve and Enjoy!
Last but not least: carve that hunk of meat! Slice it into juicy, tasty slabs that don't need any jus to make them good.

By using temperature control and thermal thinking to follow the three prime rib commandments above, you will achieve have a prime rib fit for a king … or your family and friends.
Merry Christmas from all of us here at ThermoWorks!


0 comments